Small automations sometimes really help your workflow. That's the case with my blog too. I use a static blog generator to generate my blog, and GitHub pages to host the generated HTML. This is a problem, because I have to maintain two distinct repositories, one to host my blog content, aniketpanse-in and one to host the blog itself, czardoz.github.io. I have to make sure that both the repositories are always kept in sync.
I used Travis-CI to automate this job for me. Every time I make changes to the master branch of aniketpanse-in, Travis builds the changes, and pushes them to czardoz.github.io for me.
Broadly, the whole process involves:
- Creating an SSH Key, having a private and a public part
- Associating the public Key with the GitHub repository you want to push to. (called destinationRepo hereon)
- Using Travis to encrypt the private Key, and adding it to the content repository (called sourceRepo hereon). This is the repository from which content will be generated and pushed to the destinationRepo.
- Updating the ".travis.yml" file in the sourceRepo to decrypt the private key, and use it to push updates to the destinationRepo on GitHub.
1. Create an SSH Key
An SSH Key can be associated with a GitHub repository, and you can also allow write access to the Key. It basically means that you can push changes to the repository using that key.
$ cd sourceRepo
$ ssh-keygen -C "[email protected]" -t rsa -b 4096
Generating public/private rsa key pair.
You will be asked where you want the file to be saved,
Enter file in which to save the key (/home/czardoz/.ssh/id_rsa): ./demo-secret-key
and for a passphrase for your new Key. Do use a nice unguessable passphrase here Why?.
Enter passphrase (empty for no passphrase):
Enter same passphrase again:
Your identification has been saved in ./demo-secret-key.
Your public key has been saved in ./demo-secret-key.pub.
The key fingerprint is:
f8:8e:5f:42:77:b5:77:ca:3f:25:6d:65:f3:e3:83:2a [email protected]
The key's randomart image is:
+--[ RSA 4096]----+
|                 |
|                 |
|              .  |
|       .     . oo|
|      . S . . .o*|
|       o . . ..+*|
|        o .   =oo|
|       o E   . = |
|      ..o ...   +|
+-----------------+
If you list the files in the directory right now, you should see two new files created,
$ ls demo-secret-*
demo-secret-key  demo-secret-key.pub
2. Associate Public Key with your destinationRepo
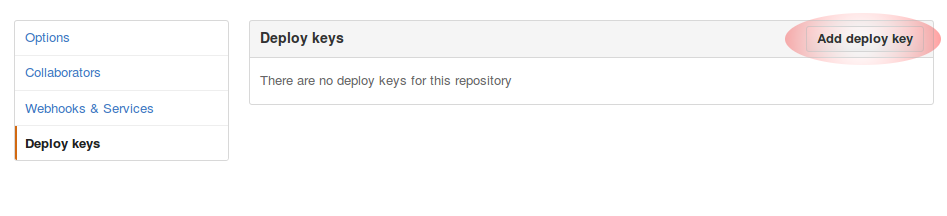
On GitHub, go to the repository's settings for destinationRepo. You should see a "Deploy Keys" menu in the sidebar. Click on "Add deploy key"
GitHub will ask for a title (put in something sensible, like "Travis Deploy Key". In the "Key" field, paste the contents of the "demo-secret-key.pub" file. Check the box for "Allow write access", since this Key will be used to push content to the repository.
3. Use the Travis CLI to encrypt the private key
If you have not already installed it, go ahead and install the Travis CLI.
$ gem install travis && travis login
After logging in to Travis, encrypt the private Key using the Travis CLI:
$ travis encrypt-file demo-secret-key
Detected repository as czardoz/autodeploy-demo-source, is this correct? \|yes\| yes
encrypting demo-secret-key for czardoz/autodeploy-demo-source
storing result as demo-secret-key.enc
storing secure env variables for decryption

Please add the following to your build script (before_install stage in your .travis.yml, for instance):

    openssl aes-256-cbc -K $encrypted_a0bda5fb43d5_key -iv $encrypted_a0bda5fb43d5_iv -in demo-secret-key.enc -out demo-secret-key -d

Pro Tip: You can add it automatically by running with --add.

Make sure to add demo-secret-key.enc to the git repository.
Make sure not to add demo-secret-key to the git repository.
Commit all changes to your .travis.yml.
Travis has now encrypted your private key, and created encrypted environment variables for you, that'll allow you to decrypt your file at build time, on Travis-CI. Helpful as ever, it also told you what command you can use to decrypt your file.
Now you just need to add the encrypted private key to your sourceRepo, and commit the change. Remove the public key.
$ git add ./demo-secret-key.enc
$ git commit -m "Adding the encrypted private key to the repository"
$ rm demo-secret-key demo-secret-key.enc
4. Update Travis Configuration to Deploy to destinationRepo
In short, Travis has to:
- Decrypt the encrypted key file
- Generate your static HTML
- Push the updated content to GitHub using the private Key
language: python
python:
  - 2.7
before_install:
    openssl aes-256-cbc -K $encrypted_a0bda5fb43d5_key -iv $encrypted_a0bda5fb43d5_iv -in demo-secret-key.enc -out demo-secret-key -d
install:
  # Extract the commit message
  - export TRAVIS_COMMIT_MSG="$(git log --format=%B --no-merges -n 1)"
  - mkdir deploy
  - git clone https://github.com/czardoz/destinationRepo.git deploy
script:
  - make docs ./deploy # Run the script that generates your HTML
after_success:
  # Add the ssh key
  - eval "$(ssh-agent)"
  - chmod 600 ./deploy.secret.key
  - ssh-add ./deploy.secret.key

  # Commit and push the updated content to "destinationRepo"
  - cd deploy
  - git checkout -B master
  - git add -A
  - git commit --allow-empty -m "$TRAVIS_COMMIT_MSG"
  - echo "Pushing changes"
  - git push [email protected]:czardoz/destinationRepo.git master
Notice that in the last git push command, we've used git@github.com instead of pushing of HTTPS. This forces git to use the SSH Key that we have added.
That's all there is to it.